Linux Command-Line Video Editing
Author: Michael Minn (see michaelminn.com for current address)
December 11, 2008
Instructions for performing simple video edits from the Linux command line
1. Introduction
The following page provides instructions and tips for performing simple video editing tasks using only command-line terminal commands. Special emphasis is given to the creation of digital video from transferred Super 8 movie film. The mmsuper8 utilities for digitizing film with a flatbed scanner are also described.
Video editing is inherently complicated and not for the faint of heart. Video editing from the terminal is fairly straightforward, but also a bit cumbersome. If you are planning anything large or complex, you should consider getting a more serious video editing package, such as Cinelerra, Kino, Linux Video Editing System (LiVES), or LVE. Also, be aware that video editing (regardless of which software you use) is very hard disk intensive. While you can use the techniques described in this document with a modest CPU and ordinary amounts of RAM, you will need considerable hard drive space for any but the most trivial video clips.
You will need some or all of these software packages to perform the tasks described in this document. Most are included with (or readily installable on) most contemporary Linux distributions.
- mplayer / mencoder: The Swiss Army Knife of media players and decoders. Make sure you have a version with the command-line interface, not one with a graphical front end.
- gqview: Simple but versatile image browser that features single click access to view frame images and move around the directory tree.
- netpbm: A set of simple command-line utilities for manipulating a variety of image formats by converting to/from the netpbm/pnm raw data formats.
- The Gimp: The definitive Linux image editing program. Helpful for color correction and adding titles.
2. Downloads & Version History
- v2008-12-11:
Revised instructions for command-line video editing in general.
Fix compilation problems related to new gcc.
Bug fixes in .mov and .avi file save
Removed unnecessary mmsuper8play and all X11 dependencies - v2005-01-15: mmsuper8 broken into separate utility programs.
- v2004-07-25: Debut beta release to the public.
3. Convert Video to Frame Files
The first step to video editing is, obviously, getting the video into a digital format that can be manipulated. These procedures convert the video to separate frame files before recombining them into the final video output file.
Converting from old Super 8 film is especially problematic since the telecine equipment needed to produce quality scans is expensive and complex. The simplest (and recommended) course of action is to send your film off to a professional service to have it scanned. Professional services vary widely in price and quality so you would be well-advised to do some research before engaging the services of a shop. Be especially aware that there are folks who use less than professional techniques, such as simply projecting the film onto a wall and videotaping it.
After some experiments with flatbed scanning, I finally broke down in 2006 and sent my film to CJS Technologies, who sent back a video DVD as well as a Mini-DV video cartrige and DVDs of uncompressed AVI files and compressed MPEG-2 files.
If you have more time than money and only a limited amount of film, it is possible to scan your Super 8 film using a flatbed scanner. This is not a recommended practice since the quality is lacking and the opportunities for damaging your irreplaceable film is substantial. But information is provided on my experience below if you want more info.
If your video is on DVD, you can extract it with mplayer. The -vo options saves individual frames to individually numbered netpbm (.ppm) files. For example, if the video I want is on title 1, chapter 10:
mplayer -vo pnm dvd://1 -chapter 10
Files from other formats can also be broken into ppm files. For example, given a Quicktime file temp.qt:
mplayer -vo pnm temp.qt
If you want to keep all the frames in a single file for transport via a network or flash drive, it is also possible to export video to a single .yuv file (sequence of uncompressed YUV 4:2:0 frame images). This is the file format used by mjpegtools, which is an alternative set of command-line video compression and manipulation tools you also might consider using if you don't like what's in this document. By default, mplayer creates the file with the name stream.yuv.
mplayer -vo yuv4mpeg dvd://1 -chapter 10
.yuv files can be played or converted to pnm files with mplayer just like other video formats.
mplayer -vo pnm video.yuv
When you are done with this step, you should have a large collection of .ppm frame image files in a single directory. If you have the disk space, you may want to make a complete copy of that directory in case you make a mistake later on and need to start back at the beginning.
4. Removing Telecine Frame Additions

DVD operates with a frame rate of 30 fps, but silent film runs at a rate of 18 fps and sound film at a rate of 24 fps. To compensate for this during the telecine process, frames are duplicated in a regular pattern that synchronizes the two rates. For silent Super 8 film, the pattern is 2,2,1, displaying three different Super 8 frames within five DVD frames.
If you are processing video that has been transferred from film to DVD and then ripped from the DVD, you may want to remove the duplicated frames. Although display may not suffer too much (since video players have to make similar compensations to the refresh rate of the computer screen), removing the additional frames will reduce the size of your video files by 40% with no loss of quality.
Before removing frames, you should determine definitively that your frames have been correctly telecined with a regular pattern. Poor conversion processes may not use a regular pattern, making removal of duplicate frames much more complex. gqview permits quick scrolling through images, and if your video has the 2,2,1 pattern, you should see a pair of matched images, a second pair of matched images, and a single image.
mplayer has features for removing telecined duplicate frames, but the settings are complex and the process is not foolproof. But, if your video has a regular telecine pattern, you can use a simple shell script to remove the duplicate frames. Make sure that your list of image files begins with
	pattern=(0 1 0 1 0 0)
	patternlength=5;

	current=0;
	for file in *.ppm; do
		if test ${pattern[$current]} -eq 1; then
			echo $current del $file;
			rm $file;
		else
			echo $current use $file;
		fi

		current=$((current + 1));
		if test $current -ge $patternlength; then
			current=0;
		fi
	done
Before running this script, in addition to verifying that you have a regular telecine pattern throughout the list of images, you should verify that the pattern begins with the first image in your list - or you will delete the wrong images and lose important frames. To get synchronized, you can either delete frames from the start of the list, or add additional duplicates.
Obviously, to preserve the telecine sequence, you should perform this step right after acquiring the frame image files and before doing any other file additions or deletions.
5. Form Editing
If you wish to remove undesired frames or move scenes around, this is the point in the process to do it. Image files for specific scenes can be moved into subdirectories for easier manipulation.
6. Color Correction

Unless your video is coming from a pristine digital source, you may want to do some color correction to compensate for losses due to flaws in the transfer process or from degredation of the film over time. You may even want to consider doing color correction on different scenes so the look of your finished video is consistent - although that is an art form in itself.
GIMP is the definitive still image editing tool for Linux. While GIMP does not have a simple "automate" feature like Photoshop, it does have as scripting language that permits batch processing of multiple images. Unfortunately, that feature (Script Fu) is complex and uses Scheme, a Lisp variant that involves a significant learning curve for non-programmers or folks who are used to the pleathora of C-like languages (PHP, Java, Javascript, etc.). On top of that, batch processing is not terribly well documented. However, you have to live with what you've got.
Scripts are kept in a subdirectory of your /home/<username> directory. Assuming you are using Gimp 2.4, that would be ~/.gimp-2.4/scripts. For example, I used a script to adjust the color levels and saturation of individual frames. After using the color->levels and color->hue/saturation tools in Gimp on a sample frame to determine the correct values, this script can be used to automate that process over all images in the directory. Use a text editor and save it in ~/.gimp-2.4/scripts/batch-correct.scm
	(define (batch-correct pattern)
        	(let* ((filelist (cadr (file-glob pattern 1))))
	                (while (not (null? filelist))
        	                (let* ((filename (car filelist))
                	                (image (car (gimp-file-load RUN-NONINTERACTIVE filename filename)))
                        	        (drawable (car (gimp-image-get-active-layer image))))
				(gimp-message filename)
        	                (gimp-levels drawable 1 1 239 1.0 0 255)
                	        (gimp-levels drawable 2 11 212 1.0 0 255)
	                        (gimp-levels drawable 3 5 181 0.85 0 255)
        	                (gimp-levels drawable 0 1 255 1.25 0 255)
                	        (gimp-hue-saturation drawable 0 0 0 68)
                        	(gimp-file-save RUN-NONINTERACTIVE image drawable filename filename)
	                        (gimp-image-delete image))
        	        (set! filelist (cdr filelist)))))
Describing what this does, you can then tweak the levels and/or saturation values for your particular set if frame images:
- The "define" line defines the name of the single function in the script and its parameters.
- The "let" and "while" scroll through the list of provided files and establish image and drawable objects that will be manipulated.
- The "gimp-message" function call prints out the name of the file being processed on the terminal so you can keep track of the progress of the batch job.
- The "gimp-levels" function calls actually do the changing of color levels on the given drawable (i.e. image). The six numbers following the drawable are the parameters for a specific channel and correspond to numbers provided in the levels dialog box in Gimp. The first number is the channel (0 = overall, 1 = red, 2 = green, 3 = blue). The second and third numbers are the low value and high values for the channel (0 - 255). The fourth number is the gamma correction (1.0 for no change, negative to decrease the midtone levels, positive to increase the midtone levels). The fifth and sixth numbers are the low and high range limits for output (leave them at 0 and 255). These are numbers you should change to match your own specific set of images.
- The "gimp-hue-saturation" function call is used in this case to increase the saturation of my old Super 8 film that had faded over time. The four numeric parameters after the drawable are hue offset lightness saturation, corresponding to the four values that can be specified in the Hue/Saturation dialog box. In this script, saturation is increased by 68, but you will want to change it (or delete the line entirely) depending on the needs of your specific set if frame images.
- Finally, the image must be saved and the image instance in the program must be deleted to free memory for the next image.
The script is invoked from the command line. Assuming you're in the directory with the frame image files and they all have a .ppm extension, this is how you start batch processing.
gimp -i -b '(batch-correct "*.ppm")' -b '(gimp-quit 0)'
The script will print out messages indicating the files it is working on, and then issue a completion message.
Tutorials on Gimp scripting mention a complex process for "registering" scripts with Gimp, but if you just invoke them like this and do not need to access them from the GUI, you do not need to go through all that bureaucracy.
6. Removing Jitter - mmsuper8dejitter
If your video was filmed with a hand-held camera, the video will probably have a certain amount of jitter that you might want to try to remove.
mmsuper8dejitter detects inter-frame jitter and flicker by performing correlation testing between frames and shifting frames to achieve maximum inter-frame correlation. As such, it is really only useful on scenes that are largely static. It also most effective only when used on frames that constitute a single scene; it should not be run on frames that constitute multiple scenes. It does not crop the corresponding blank space added around the edges as it moves the image around, so you will probably need to do some cropping later.
The syntax of the command is:
mmsuper8dejitter <max_shift> <pnmfile1> <pnmfile2> ...
The single max_shift parameter is the maximum number of pixels to shift. With my 720 x 480 frames, a value of 8 seemed to give good results, although you may want to try different values depending on the severity of your situation. Assuming you are in the directory with your image frame files and they have a .ppm extension:
mmsuper8dejitter 8 *.ppm
8. JPEG conversion / Scaling / Cropping
MPEG-4 encoding uses the JPEG compression technique, so your ppm files will need to be converted to JPEG files prior encoding. However, you will not want to replace the PNM files with JPEG files because JPEG is a lossy codec and if you need to edit or manipulate your files later, multiple loads/saves of JPEG files results in cumulative image degredation.
If you wish your finished video to be less wide and/or high than the image frame files, you will want to scale and/or crop the images. If you have run mmsuper8dejitter, cropping will be essential to remove the resulting extraneous edge material. Cropping can also be useful if you wish to isolate (blow up) a specific section of the scene.
If the size of your finished video file is important, you have a choice of making the image size smaller or increasing the compression level (the -quality parameter) to reduce the quality of the image. Personally, I generally prefer a smaller, higher-quality image to a larger, crappier one, but the choice depends on your situation and personal taste. The pnmtojpeg man page gives info on other options (including grayscale conversion) that can be used.
The following is a bash script I used to scale my 720 x 480 captured video into 333 x 208 more suitable for the web. The pbmtools programs pnmcut, pamscale and pnmtojpeg are used for the actual manipulations and conversion. Because the video ripped from DVD contained a black border and because I used mmsuper8dejitter, I first cropped the edges, then reduced by 50% (the reciprocal of the 2 parameter on pamcut) to get the final image size. Temporary files are used to preserve the original ppm files, and because all of the pbmtools programs require output to a separate file from the input:
	for file in *.ppm; do
		output=${file/.ppm/.jpg}
		echo $file to $output
		pnmcut -left 28 -top 32 -right 692 -bottom 446 $file > temp.ppm
		pamscale -reduce 2 temp.ppm > temp2.ppm
		pnmtojpeg temp2.ppm > $output
		rm temp.ppm temp2.ppm
	done
If you wish to verify everything is still good at this point, MPlayer can then be used to view the JPEG files as video. Note the specification of fps=18 to view at silent film speed of 18 frames-per-second:
mplayer mf://*.jpg -mf fps=18:type=jpg
9. Titles
Gimp can be used to create title frames and a script can be used to duplicate that frame for the number of frames needed to occupy the desired amount of video time. Assuming you have created a title slide title.jpg and wish the title to run for three seconds (3 * 18fps = 54):
	for ((x=3000;x<=3053;++x)); do
		outfile=`printf "%08d.jpg" $x`
		echo $outfile
		cp -p title.jpg $outfile
	done
Be sure the file names you choose are not duplicated by existing frame files or you will overwrite them. This is a situation where it is helpful to place individual scenes of the video in separate subdirectories
10. Fade Transitions
mmsuper8fade can be used to fade in or fade out a sequence of frames. A fade in may be appropriate for titles or the beginning of the video and a fade out appropriate at the end. The syntax is:
mmsuper8fade <in | out> <pnmfile1> <pnmfile2> ...
11. Encoding
MEncoder comes with MPlayer and can be used to create MPEG-4 (DivX) encoded .avi files that are playable on most operating systems. MEncoder is highly preferred to other utilities because it uses non-proprietary formats and codecs. Mencoder has a multitude of options (described on the mplayer man page and in this tutorial). MPEG-4 files (AVI + DivX + MP3 sound) can be uploaded to YouTube and are the preferred format. |
For a simple 18fps silent encode with all .jpg files in the current directory:
mencoder "mf://*.jpg" -mf fps=18 -ovc lavc -o finished.avi
If you have your frame image files in separate subdirectories:
mencoder "mf://*/*.jpg" -mf fps=18 -ovc lavc -o finished.avi
If you have some soundtrack music you wish to accompany the video (in this example, in soundtrack.wav):
mencoder "mf://*.jpg" -mf fps=18 -ovc lavc -o finished.avi -oac mp3lame -audiofile soundtrack.wav
The finished video can then be played with mplayer:
mplayer finished.avi
12. Archiving your Work
Although the final product is an encoded .avi file, you may want to archive the frame files in case you need to do more edits or recover your work. .ppm files are a bit large and should probably be converted to .png files (a lossless file format) for archiving purposes. JPEG files are not advised for archival purposes since the compression process loses quality (JPEG is a lossy format). Conversion to .png files can be done with a simple script using the netpbm pnmtopng utility:
	for file in *.ppm; do
		output=${file/.ppm/.png}
		echo $file to $output
		pnmtopng &file > $output
	done
Once you've verified the .png conversion worked OK, you can delete the .ppm files. They can be recovered with the pngtopnm utility:
	for file in *.png; do
		output=${file/.png/.ppm}
		echo $file to $output
		pngtopnm &file > $output
	done
14. Other MMSUPER8 Utilities
mmsuper8 is a package of utilities I created to facilitate flatbed scanning of Super 8 film. While some of the utilities are inferior to other available programs, they are retained in case they might prove useful in some unforseen situation. In all cases, "frame_file" indicate individual frame image files, not composite scans of multiple frames.
mmsuper8mov combines frame image .ppm files into uncompressed Quicktime (tm) files. While such files are not useful for viewing (mplayer doesn't like them) and too large for normal distribution, they are useful as input to RealProducer (see below).
	mmsuper8mov [options] frame_file ...

		-o output_file
			Specifies name of output file (default is movie.mov)

		-b
			Output file should be black-and-white (i.e. grayscale)

		-rate fps
			Specifies frame rate (default is 18 bps)
mmsuper8avi combines frame image .ppm files into a single uncompressed .avi movie file. This utility is deprecated by mencoder, which creates compressed .avi files.
	mmsuper8avi [options] framefile...

		-o output_file
			Specifies name of output file (default is movie.avi)

		-b
			Output file should be black-and-white (i.e. grayscale)

		-rate fps
			Specifies frame rate (default is 18 bps)
mmsuper8list performs a list of the chunks (.avi) or atoms (.mov) in a video file. This utility was part of my work figuring out how to create .avi and .mov files is provided for diagnosing problems or examining the content of existing .avi or .mov files.
mmsuper8normalize normalizes colors in frame files. With no options, mmsuper8normalize simply finds the high and low values for each color and redistributes the intensity values across the given range. This usually improves the saturation and color balance for old films with faded colors and scans with poor levels. However, this can introduce additional flicker since normalization will be affected by dust, scratches and inconsistencies in scanner source light over the length of a scan.
This is a rather crude utility and image normalization (i.e. auto leveling) would best be performed using Gimp batch processing as described above.
Specific min/max values can be specified for each color. Optimal settings can be determined by trial and error or by experimenting on a single frame with the levels color tool in Gimp.
Finally, after color correction, a new midpoint for luminance distribution can be specified. This effectively lightens or darkens the final image.
	mmsuper8normalize [options] frame_file ...

		-red min max
			Overrides automatic detection of min/max red color values

		-green min max
			Overrides automatic detection of min/max red color values

		-blue min max
			Overrides automatic detection of min/max red color values

		-mid midpoint
			Specifies midpoint for adjusting luminance after normalization
mmsuper8deflicker adjusts luminance midpoint on a series of frame files so each frame has the same average overall luminance. Scanners and scanning light sources are rarely even across the length of a strip of film. This utility may not be very effective with groups of frames with large amounts of motion or widely changing levels of darkness.
	mmsuper8deflicker [-l red green blue gray] frame_file ...

		-l specify desired luminance values (do not compute an average from all frames)
Luminance values (if specified) are 0 - 255. You can find the luminance of a frame you like by running mmsuper8deflicker on that frame and reading the values printed by the program. Those values can then be applied to the rest of the frames.
mmsuper8jitter adds jitter, flicker and grain to a sequence of frame files to create the illusion of an early 20th century film. This is a fairly crude utility and the effect is not terribly realistic.
	mmsuper8jitter [options] [pnmfile1 pnmfile2 ...]

		-jitter (pixels)
			Simulates worn sprocket holes which cause steady
			images to jitter slightly. Specifies the maximum
			value for random frame position shift between frames.
			Default is 1 pixel. Larger values look more like
			an earthquake than jitter. Value of 0 turns off
			this effect.

		-flicker (level)
			Simulates random variability in image intensity
			caused by inconsistent film sensitivity and
			inconsistent frame exposure times. Specifies a
			maximum value for random intensity value added to
			each frame, assuming 8-bit images with an intensity
			range of 0 - 255. Default is 16. Value of 0
			turns off this effect.

		-grainlevel (grain level)
		-graincount (grain count)

			Simulates film grain by adding random points of
			intensity to the image. Specifies the maximum intensity
			of each point (assuming 8-bit depth). Default level
			is 12 and default count is width * height * 2.
15. Real Producer
RealProducer can import uncompressed .mov files (created with mmsuper8mov, described above) and output compressed .rm files that can be streamed on the internet. You can download a Linux tarball from the Real.com website.
	mmsuper8mov *.ppm
	realproducer -i movie.mov -o movie.rm -t 8 -f 0 -b "Title" -h "Author" -c "(c) 2004 by Author"
I assume that normal digital video editing software can import .mov or .avi files, although I have never tried.
16. Flatbed Scanning

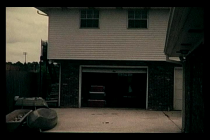
Sample scan from a commercial print |
If you have more time than money and are either desperate or not concerned about the quality of your film-to-video transfer, it is possible to scan Super 8 film using a conventional flatbed scanner. Not recommended, but possible.
The challenge with scanning Super 8 film is to find a physical setup that will hold the film steady in the scanning area and make it possible to quickly advance the film between scans.
Scanner: The scanner itself should be at minimum capable of 1200 dpi OPTICAL scan resolution (not interpolation from a lower resolution) with 2400 or 3600 even better (but slower). I use an Epson Perfection 2400, a USB scanner supported under Linux and providing 2400 DPI resolution.
Light Source: You will need some sort of diffuse light source to backlight the film. Scanners that have transparency adapters built into their covers usually place them in the same orientation as the scanner glass. Although the results MAY be more accurate, scanning a high resolution lengthwise (using only a small portion of the scanning platen) is MUCH slower than scanning sideways (using the full length of the scanning platen). Therefore, some way of back illuminating the film must be found. I use an old freestanding HP ScanJet HPA transparency adapter that I purchased on ebay. To hold the film down on the glass, I remove the diffuser and light unit from the case to press the film against the glass. Finding something that will provide a consistent light source is difficult.
Film Guide: While the mmsuper8 software detects sprocket holes and crops individual frames, some kind of guide is needed to place the film in a consistent place on the glass and facilitate pulling an appropriate number of frames through between scans without and undue number of dropped or duplicated frames. Using foam mounting tape, I created guides on each side of the scanner. As noted above, scans are performed sideways, which is much faster than scanning lengthwise.
Scanimage Script: SANE (the Linux Scanner support package) provides the command line scanimage utility for controlling scanners. This permits using a script to control scanning and reduce the number of mouse actions and keystrokes that must be performed for each scan. This will require some tweaking for your individual situation to reduce the scanned area to the minimum area needed to capture as many frames as possible. The example given below also uses the pnmflip command since the film is scanned sideways, but mmsuper8 requires strips of frames that are oriented top to bottom.
index=0 while true; do filename=`printf "%03d.pnm" $((index))` echo "pressto scan" $filename read scanimage --resolution 1200 -l 15 -t 11 -y 11 -x 185 --mode Color > temp.pnm pnmflip -rotate270 temp.pnm > $filename rm temp.pnm index=$((index+1)) done exit
Although it is usually impossible to get the scanner to run without the scanner lamp on, this does not adversely affect the quality of most well-exposed film, provided that there is a consistent light behind the transparency. Dirt and scratches on underexposed film will reflect light, causing the defects to be light colored in the scan.
Scanners with built-in transparency adapters detect the presence of the adapter, so you can't use the transparency setting if the lid has been removed. Also they usually limit the scanning dimensions to the area convered by the transparency adapter, and as stated above, lengthwise scanning of super 8 film at high resolution is prohibitively slow.
To detect edges successfully, mmsuper8 requires that the scan strips be oriented top to bottom and that the left and right areas in the scan be white. The image should also be cropped so that the frames are usable from top and bottom.
With my physical setup, each scan captures around seven inches (40 frames - around two seconds) and takes about a minute. At this rate, I was able to scan a 50-foot roll in around an hour.

|

|

|
mmsuper8frame takes as input scans of super 8 film in pnm files that are strips of frames oriented top to bottom and have ONLY white area to the left and right of the film scan (for edge and sprocket hole detection).
mmsuper8frame takes as input one or more pnm files. PNM is an extremely simple, uncompressed format that is the output of the scanimage program. While this format consumes a significant amount of space (around 200K/frame at 2400DPI), it is extremely easy to read, does not use lossy compression, and should be readable in the future when proprietary format algorithms have been long forgotten.
mmsuper8frame outputs sequentially numbered PNM files with one file for each frame (e.g. frame00000.pnm, frame00001.pnm, etc.)
You should try a few sample scans before putting in the effort to scan a whole roll of film.
	mmsuper8frame [options] scan_file.pnm ...

		-b
			Output will be black and white (i.e. grayscale) (default is color)

		-resolution dpi
			Specifies image resolution for frame sizing based on dimensions of
			standard super8 film. Should be specified even if automatic frame
			detection is overridden. (default is 1200)

		-clipleft pixels
		-clipright pixels
		-cliptop pixels
		-clipbottom pixels
			Crops a given number of pixels from left/right/top/bottom of each frame
			These values can be negative.

		-nosprocket
			Turns off sprocket hole detection and assumes the top of the first
			frame is the top of the input image(s) and that subsequent frames
			follow at exactly the appropriate frame height for the given resolution.
			Useful for scans of commercial prints where sprocket holes are
			not detectable in the scan.

		-frameoffset pixels
			When not using sprocket hole detection, the top of the first frame
			is assumed to start at the very top of the scan file. This
			parameter can be used when the first frame should start at
			a lower location. Value is in pixels and can only be positive.
			Note that this parameter turns off sprocket hole detection.

		-frameheight pixels
			When not using sprocket hole detection, variation in scanner
			accuracy will cause frame drift. This parameter can be tweaked
			to adjust the spacing between frames. Values are in pixels.
			Default is 200 at 1200 DPI. This parameter turns off sprocket
			hole detection: -cliptop and -clipbottom should be used for
			adjusting framing and/or modifying the size of the output frame.

		-framefromright
		-framefromleft
			Normally a dark left edge is assumed for finding the horizontal
			location of a frame. This should also work for commercial
			prints that have clear sprocket area since the detected width
			will be less than 8mm and the left edge is adjusted accordingly.
			However, some commercial prints are framed so the picture area
			abuts the clear sprocket area. If the content of the picture
			is light, there will be no left edge to detect and horizontal
			framing will be incorrect. In those cases, there may be a dark
			right border which can be used. -framefromright causes usage
			of the right border for framing. The default is framing from
			the left and -framefromleft can be used to restore left
			framing if -framefromright was given for a previous file in a
			list of input files.

		-sprocket
			Turns sprocket hole detection back on if -nosprocket was given
			before a previous input file.

		-frameheight pixels
			Specifies distance between each frame (used with -frameoffset to
			override automatic frame detection)

		-frameoffset pixels
			Specifies top starting point for frame extraction (used with
			-frameheight to override automatic frame detection)

		-framenumber number
			Starting number for output files (default is 00000)
Examples:
Home Movies: Home movies normally have emulsion covering the entire width of the film and therefore have white sprocket holes against a black background. In this scenario, when given the correct resolution, mmusuper8 should be able to detect sprocket holes and create frame files without any additional parameters. Multiple input strip files can be included with each invocation of mmsuper8. The following invocation assumes the strip files are scanned at 1,200 DPI and will create a sequence of files named frame00001.pnm, frame00002.pnm, etc.
mmsuper8frame strip001.pnm strip002.pnm strip003.pnm
Commercial Print: Commercial super 8 prints often have emulsion only in the frame area of the film. Therefore, the sprocket area is clear and mmsuper8 is incapable of detecting sprocket holes. Complicating matters, the printed image may not be correctly centered in the frame area, making it impossible to detect the left edge of the film. In these cases, specific framing information FOR EACH STRIP FILE must be given.
	mmsuper8frame -nosprocket -frameoffset 280 -frameheight 397 -framefromright
		-clipright 20 -clipleft 20 -resolution 2400 2400_strip.pnm
The example above works with this brief sample strip. Note that this strip is in PNG format to save server space since PNM files are quite large. It needs to be converted from PNG to PNM with gimp or some other image processing utility. An brief example of this strip converted to a movie (in RealVideo format) is given here.
- -nosprocket: turns off automatic sprocket hole detection
- -frameoffset 280: indicates that the top of the first frame in the strip starts at y pixel 280. Since it is very difficult to accurately scan the film with the top of the frame matching the top of the scan, this will probably change with each strip scan file.
- -frameheight 397: At 2,400 DPI, frames should be 400 pixels high. However, scans are rarely perfect and frameheight must be tweaked so the framing does not shift as mmsuper8 progresses down the strip. Note that this does not adjust the actual height of the extracted frame; cliptop and/or clipbottom must be used for that, although the default is usually fine.
- -framefromright: This particular print has a poorly centered frame and the frame bleeds over left edge, which is normally used to find the edge of the film. As such, when the frame content is lightly colored, it is impossible to detect where the edge starts. However, the right edge is consistently dark, so this flag indicates to use the right edge
- -clipright 20 -clipleft 20: The mmsuper8 default frame width will normally capture the entire frame area width. However, in this example, because the left and right edges of the film are clear and because of the the poor frame centering of the print, the left and right edges are cropped to remove extraneous material.
- -resolution 2400: mmsuper8 defaults to 1200 DPI and will not attempt to infer DPI from the scan file since PNM file headers do not include any DPI information. -resolution MUST be specified if the scan is anything other than 1200 DPI.
There are a few other pages on the web provided by other people who have tried flatbed scanning of super8 film:
The way I look at it, life is meaningless. The meaningfulness is what you impart to it. (Jason Everman)